Wednesday, December 2, 2015

Winter Snow


Winter Snow


Here is what I used for the tag above:
Tube- Psyco Jimi from MTA.
Christmas in a Girl's world by Sherena HERE.

The scrapkit is not available.
Please use a suitable replacement.

For the word art, I use Beyond Wonderland Font HERE

Darleston font for name
Pixelette for credits
Mask I used LLM-140  HERE.


Optional-
Snowflake tube from my Psp, You may use the snowflakes in the kit. 
Candy cane tube from my PSP. I am not sure where you can get these anymore. 
About.com has some great Holiday graphics HERE.


Frame 1- 75%. Click inside frame and add a new raster layer. 
Copy and paste Paper 6 into selection- Deselect. Move this layer under your frame.
Add your tube and then the elements 
to cover up the cut off part, if using a half tube. 

I used 
Poinsettia 02 resized 35% and Place on the frame on left.
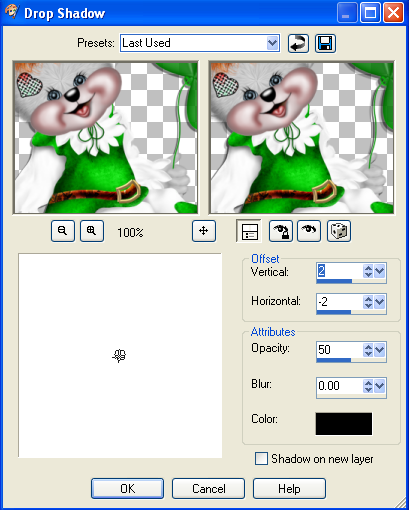
 D/S. Duplicate and mirror.
Deco- Resized 35%.
Blue candle-35%.
Pink Candle-25%.
White candle 30%.
Teddy- 40%. I put one of the candy canes to 
where it looks like the teddy is holding it.


Bottom layer- New raster layer- Select all-copy and paste paper 9 into selection. Deselect.
Add your mask- Then go to effects-Texture effects- Blinds.  Settings-Width- 4, Opacity-60, Color- White. Both Horozontal and Light from left/top boxes checked. Click ok.

Add some sparkles if you want.

For my name I used Darleston size 72- black/0.3 black 
stroke, and duplicated it. I also 
added  a white gradient glow and Drop shadow on the 
bottom layer. 

Add any other elements you want. 
Drop shadow  your layers except the mask layer. 

Add your watermark if you wish, and make 
sure you add the copyright for the image you used.
Add your name or name(s) of whoever you want.
I saved mine as a PNG image.

You are done!

Please tick the boxes below and let me know how 
you like my tutorial. I would love to see your results!


Friday, November 20, 2015

Thinking of Paris, France


The above tag was made in a challenge I participated 
in at the Creative Chicks. 

My personal heartfelt condolences go out to the people in Paris, France
and their families.  

Now to the tutorial on how I made the above tag:


For this tag I used
A Barbara Jensen Free tube  HERE.
Paris Dreams Kit by Scraps Dimensions HERE.

The scrapkit is not available because the Blog has been deleted.
Please use a suitable replacement.
Updated 6/23/2024

Mask of choice. The mask I used is  an exclusive to the Creative
Chicks. It will not be available until Dec 1, 2015 on our blog HERE.

Mask is not available on the CC Blog. Please go HERE CC_Older_Files.

You will be looking for CC-St-Pat_Masks-_March-2016 in the Masks folder.

Cajoline Paris By Night paper 1 HERE.

NOTE: Due to the blog being deleted, the paper is
 not available. Please use a suitable replacement.


As always, I use Pixelette for my credits.

New Image 600x600 Transparent. 
New layer- select all, copy 
Paper 4 and paste into selection. Add your mask from disk or from image.
I resized mine by 95%.

Clock 65% . I set the properties to overlay.
Umbrella   65%  Then 75%.
Tube-I did not resize mine. 
Wordart-80%
For my name, I drew a vector circle around the clock and positioned and re-sized 
the circle to where I liked it. Do not convert it to raster, yet! 

 If you do not know how to do text on a curve,
I am not going into a tutorial within a tutorial about text on a curve. However, 
here is a great tutorial for text on a curve by Another Jo:


Add any other elements you want. 
Drop shadow  your layers except the mask layer. 

Add your watermark if you wish, and make 
sure you add the copyright for the image you used.
Add your name or name(s) of whoever you want.
I saved mine as a PNG image.

You are done!

Please tick the boxes below and let me know how 
you like my tutorial. I would love to see your results!


Thankful For Friends


Tube of choice. I used the incredible work of Cris Ortega
Scrapkit by Melissa called Thankful for Friends HERE.

NOTE:  Kit not available. 
Please find a suitable replacement.
Updated 6/23/2024


Millies Thankful template MPM02 Here.
Mask of Choice-I used my LLM_114 mask here.


Eye Candy 4000 Gradient Glow- Optional.

Ready? Ok! Let's begin!
Shift D to duplicate and close original template.
From bottom- add a new layer select all, copy and paste Paper 3 into selections.
Add  a mask of choice or use my mask--LLM_114 from disc and merge group.
For each of the paper layers, I pasted the paper into selections, 
unless other wise instructed.

Below are the layers and papers I used for them. 
Of course, you may want 
to change it up as you see fit:

Rasters 1 and 2--Paper 7.
Raster 3 -- Paper 03.
Raster 4 -- Paper 6.
Raster 5 -- Paper 6-New layer re-size paper by 50% .
Rasters 6  and 7-- Paper 8-New layer, re-size paper by 50%.
I did this layer a bit different:
Raster 8   I used Paper 2.
 Select all, float, defloat, selections modify contract by 4, add a new 
raster layer copy and paste paper two into selections.
Then go to selections-modify, expand by 4, add a new raster layer 
and move under the paper layer. 
Then floodfill with white and add noise to this layer. Deselect. 
Raster 9 and raster 10 add a gradient glow and 
drop shadow to both wordart layers. 
Make sure you delete or hide all original layers. 

At this point I cropped mine and re sized all layers to where I got 
it to about a 625x564. 

If you get your tag even close to my tag's size, you should be able to
resize the following elements within a couple of percentage points.

I used:
El 4  copy and paste it onto your canvas, Re-size 80%,
 and Place to right side, duplicate mirror. 
Element 6 re-sized 40%.
El 8 re-sized by 40%.  D/S Place to right of wordart, duplicate and mirror.
El 10 Re-sized 65%.
El 11 re-sized to 65%.  Place to right side, duplicate mirror. 
Element 12 re sized 40%  Place to right side, duplicate mirror. 
El 13 re-sized 80%   Place to right side, duplicate mirror. 
El 14 --I did not re-size. 
El 17 --Did not re-size.
Element 19 re-sized 40%.
El 20 Re-sized 45%.
E-25 Hearts re-sized by 40%.

Add any other element you wish and re-size tag to your liking.
For my name, I used a yellow gradient glow- #f7ff00. Remember 
this is optional. 

Add your watermark if you wish, and make 
sure you add the copyright for the image you used.
Add your name or name(s) of whoever you want.
I saved mine as a PNG image.

You are done!

Please let me know how 
you like my tutorial. I would love to see your results!

Friday, November 6, 2015

Attitude


Here is what I used for the tag above:
I used 2 Tubes by  Arthur Crow . They are  Exclusive tubes only 
at the Creative Chicks forum Here. You must be a member at the forum to
get them. 

Kristin Template 184 and her Kit Rock attitude on her blog here:

ROCK ATTITUDE Kit Here.

Mask 3 From Rocked by Rachel Here.

Font -- AR JULIAN 
Wordart by Kathyfrances here.

Eye Candy  4000 Gradient glow -- Optional

Ready? Ok! Let's start!
Grab your template and Shift D to duplicate. 
Resize canvas to 800x800.
Copy and paste Paper 15 into selection and apply your mask. 
I added the Glitter resized 80% above the mask.
Doodle 1-Colorized to 210/190.
Doodle 4 re-sized by 85%.
Top Circle  and Bottom Circle I used  Paper 9  pasted into selection.
Top Square and Bottom Square - Paper 11 into selection.
Top Rectangle and Bottom Rectangle- Paper 13 pasted into selection.
Round Rectangle -Paper 16 pasted into selection.
Circle-  Paper 6  pasted into selection.
Spike frame resize by 80%- Place over circle layer.
Lips- 50% Duplicate and mirror. 
Guitar  resized 50%  rotated 25 left - sharpen.
Beaded String by Kristin resized 50% Duplicate and mirror.
Bead Resized 50%.
Speakers  40% Duplicate and mirror.
Headphones resized 25%.
Sunglasses resized by 35%  - Duplicate and mirror. Colorize one blue.
I put them on the speakers.
Skull 1 resized 25%.
Sparkles. Duplicate a couple of times and spread around tag. I 
lowered the opacity to a couple of the layers too. This is optional.
Add your tube and place it (them) to your liking.
You may use my tag for a guide on where I placed my elements, but
feel free to place to your liking.
then I re sized the tag by 67% -All layers checked.
Add any other elements that you want!!
Then I added the  Wordart- Resized 70%. 
I used Paper 2 from the kit to color it.
I also added a white layer with noise on the bottom
 of each paper layer andthe word art layer.
To do this go here.
I used 100% for the noise settings. 

Add your watermark if you wish, and make 
sure you add the copyright for the image you used.
Add your name or name(s) of whoever you want.
I saved mine as a PNG image.

You are done!

Please tick the boxes below and let me know how 
you like my tutorial. I would love to see your results! 


Autumn Whispers


Here is what we will be making:


Tube by the awesome work of Alex Prihodko from Pics for Design.

Horseplays Whispers of Autumn Kit HERE.

Mask  of choice. I used two masks:  WSL Mask 249  Here:  

It will be in a bundle in the sidebar in a download link.
NOTE:  Masks are not available. Please find a suitable replacement.
Updated 6/23/2024

 I also used my mask LLM_118 Here:  
Font: Amaze- Color #635933 with a 0.3 Black stroke. 
Image 600x600 Transparent
Select all, Add a new layer. Copy and paste paper of choice into 
selection. I chose  Paper 9. Add WSL Mask 249 or mask of choice.
Repeat above step for Paper 5 and Mask LLM_118  Or second mask of choice.
Copy and paste frame and resize by 75%. Click inside frame, expand by 10 and add a new layer. Then copy and paste Paper 9 or your choice of paper into selection. 

Now add your  tube and elements.
I used:
Candle-25%
38- Pumpkins 50%
Autumn wordart  45%. Duplicate. On Bottom layer add gradient glow,
 if you have the plug-in and drop shadow of choice. 
El 11-Squirrel resized 45%.
39-Nuts resized -- 45%.
Leaves resized 75% - Duplicate, Mirror and resize this layer by 65%.
Drop shadow all layers except mask layers. 

Add any other elements that you want!!

Add your watermark if you wish, and make 
sure you add the copyright for the image you used.
Add your name or name(s) of whoever you want.
I saved mine as a PNG image.

You are done!

Please tick the boxes below and let me know how 
you like my tutorial. I would love to see your results! 


Wednesday, October 14, 2015

Ghastly


Here is what we will be making:


Supplies I used are
Toxic Desires Graveyard kit. 
It was Ptu now FTU. Get it HERE.

Tube- I used a couple of tubes by Toosh Toosh.
Masks of choice or the one I used  LLM_114 by me  HERE.
I also used one from here also by me called LLM-Hallo-4. 
You can find it HERE at the Creative Chicks Blog. 

NOTE: HALLO-4  can be found HERE
Look for 
LLM_Halloween-Masks-Exclusive-For-CC-2015.rar

Fonts used are pixelette and FreakyNight. 
You may find them at dafont.

Open a new image 600x600 Transparent.
Flood fill raster 1 with white and name it Background, 
or name it whatever you want.
New raster layer-name it for the paper you are using. 
I used paper 17. Select all copy and paste your paper 
into the selection. Deselect. Add
 your mask from image or from disc. This
 depends on which mask you are using. Merge group. 
 Change the layer properties to overlay.
Now add a new layer underneath this one. Again, name 
it for the paper you are using. I used Paper 3. 
Add the other mask or another of choice.  Merge group.
Copy and paste the house onto your canvas. Resize it by 90%. 
Copy and paste Tree 1 re-sized 75%. Put it somewhere in front of the house.
Copy and paste the full moon and re-size it 55%. Make sure it is 
under the House layer. I put mine to the right top. 
Duplicate the moon and on bottom layer add a yellowish gradient glow. 
Copy and paste both  bushes and re-size them to 50%. 
Duplicate each one and put them around the front of the house.
Put one behind the house on one corner, duplicate and mirror.
Cat-re-sized by 35%.
Sign re-size by 50%.
Grass 1-re-size by 90% and put under the house layer. Duplicate and mirror.
Grass 2 re-size 50%. Place in front of sign.
Re-size the ghost by 50%. Place to one side. Duplicate and mirror.
Cloud 2 re-sized 50%. Place behind house up around the moon.
Bat  re-sized to 35%. 
pumpkin- re-size by 40%. Duplicate and re-size by 85%. 
Duplicate this one and resize by 75%.
Place your pumpkins where you want. I just lined mine up.
Arrange your tag to your liking or see my tag for reference. 
Add your tube. If you used the same ones I did, I re-sized the girl 
55%  and re sized the Toosh Toosh Tombstones by 35%.

Add your watermark if you wish, and make 
sure you add the copyright for the image you used.

Add your name or name(s) of whoever you want.
I saved mine as a PNG image.

You are done!

Please tick the boxes below and let me know how 
you like my tutorial. I would love to see your results! 


Friday, September 25, 2015

Nah An Angel


Here is what we will be making today: 


Supplies I used:

Missy template #338  Here.

Kit  Attitude Babe   by Bibi   HERE.
You will need  a password for the kits. Click on "Click to get the Password" on the left
side of her page. It will take you to her FaceBook page. If it
doesn't show it immediately, click on the 30 FTU kits link.
Sorry, I cannot provide it here, so please do not ask. 

Bibi's kits are no longer available.
Please find a suitable substitute.
Updated 6/23/2024

Mask  from Millie .

MPM mask 14- Put in your mask folder.  You may find it HERE.

Tube I used by Ismael Rac-His site is HERE.
Font:  Coneria Script Demo- HERE.
   Size 52- Blue Metallic Gradient- 0.8 BLack stroke.

Grab the template Shift D to duplicate.
Click on the Bottom layer, Select all, copy and paste paper 1 into selection. Deselect.
Mask from disc- Find MPM mask 14. Apply it. Merge-Merge Group.
The next part is optional, but this is how I made the tag you see above---
Duplicate your mask layer, flip- duplicate again and image 
free rotate 30 to the right. duplicate and mirror. 
Glittered circle layer-Select all, float, defloat, new raster layer, fill with white. Adjust, Add Remove noise-Settings ---Uniform, 100, Monochrome checked. 
Circle--Select all, float, defloat, new raster layer, Add a new raster layer copy and paste Paper 6 into selection. Deselect. 
Dotted circle...Manual color correction to pink
thin rectangle--Select all, float, defloat, Copy and paste paper of choice--I chose paper 7  as a new layer. I resized my paper 70% two times-Moved the part of the paper that I wanted showing over my selection.
Rectangle--Select all, float, defloat, new raster layer, fill with white. Adjust, Add Remove noise-Apply your noise ---Uniform, 100 Monochrome checked. Repeat.
Click inside your pink frame to where you have a rectangle selection.
Modify Expand selection by 5-add a new raster layer, copy and paste your paper 
of choice-I chose paper 8. Selections invert-Delete-Deselect.
Shape- Select all, float, defloat, new raster layer, copy and Paste paper 3 as a new layer. . Selections invert-Delete-Deselect.
Add your tube and resize it to where it looks best. If you are using the same tube as I am, I resized mine 55%. 
For the wordart layer I duplicated it. On the bottom layer I added the same noise settings as I did the frame layers. On the top layer I Set the  layer properties to overlay. 
Make sure you have deleted or hidden all original template layers.
Use your Elements of choice or the
Elements I used and see my tag for where I placed them: 
EL 2-Glasses resized 45%
El 75-Mirrored  resized 45%
El 140- Resized 50%
39-Cigs Resized 35%
EL 3 Resized 45% 
El 105- I did not resize.  duplicate  On Bottom layer I added a thick gradient glow and
added noise. I used the same settings as before.
El 15- Resized 75%.

Add your watermark if you wish and copyright for the image you used.
Add your name or name(s) of whoever you want.
I saved mine as a PNG image.

You are done!
Please tick the boxes below and let me know how 
you like my tutorial. I would love to see your results! 


Friday, September 18, 2015

Enjoying Autumn


Here is what we will be making--well, yours should be 
similar to mine:


Fall Template # 3 By Brutal Designs HERE.

Template not available. Please use a suitable replacement.
Updated 6/23/2024

Bountiful Fall Kit By Fab Designs HERE.
at the Creative Misfits blog.

Mask of choice or you may 
use the mask I used HERE called LLM_107.
It is the bottom one.

Eye Candy 4000 Gradient Glow.

Each paper was colorized to 25/255.
Font of choice. I used   Great Vibes for the name and Pixelette for the credits.
Tube I used was ©PinUpToons www.pinuptoons.com  
 You can find this work at CDO.  

***Remember to save often in case your program shuts down on you!
Optional - - Name each layer of your choice  name.***
Ok Ready? Let's Start! 

Get your template and Shift D to duplicate. Close the original. 
Re-size canvas to 800x800-Optional.
Delete or hide the credit and stamp beige layers. 

Bottom layer. Name your layer -- I named mine bottom. New layer-Name it the paper that you used. I used paper 6. Copy paper 6 and select all and paste it into selection.
Find your mask from image or from disc and apply it. Merge-Merge group.
Duplicate this layer.  I colorized it to 25/255 and lowered the opacity to 50. Set the Layer properties to dissolve.

For the Gradient leaf layer, you may leave it or colorize it.
I used a gradient that I made. 

Ellipse Red layer- paper 13 colorized to 25/255.
Rectangle light green   Paper 14 colorized to 25/255.
Large Leaf layer- Gradient of choice or just colorize to 25/255.
Small leaf layer  -Gradient of choice or just colorize to 25 /255.
Stamp Green layer  -Paper 12 into selection--Colorized to 25/255.
Rectangle Yellow layer- Gradient of choice or just colorize  to 25/255.
Rounded Rectangle - Gradient of choice or just colorize  to 25/255.
Wordart Layer I duplicated it and on the bottom layer I used Eye Candy Gradient glow.
If you do not have this plug in, No worries. Go HERE for an alternate. 
I also used the alternate to gradient glow way to add the white with noise 
for each template layer. 

Elements I used:

Leaves 1 resized 50% duplicate and mirror.
Pumpkin resized 45%.
Mushroom- 25%. Duplicate and resize this one by 80%.
Lantern resized 65%.
Leaves 2 resized 25% --- Duplicate then resize 80%
Sparkle 1 - I did One step photo fix to turn them white. Tree-75%
Tube  Pin up Toons  -- did not resize
Nuts 45 % -- Duplicate then resize -75%
Pumpkins for sale sign  resized 75%
Arrange your elements to where you like them.


Now, if you sized your canvas the same size as mine, Then re-size all layers 85%. 
Or resize to your liking, I like my final tags to be less than 650x650.

Add your watermark if you wish and copyright for the image you used.
Add your name or name(s) of whoever you want.
I saved mine as a PNG image.

You are done!
Please tick the boxes below and let me know how 
you like my tutorial. I would love to see your results! 


I hope I am back! LOL


I sure hope I am back for good!  LOL
I have internet again, and I will be posting 
some tutorials here tonight or in the morning. 
I have 4 to post, but I want to make sure the spelling and
links are ok first.

See yas soon! 


Sunday, August 23, 2015

NEW Tutorial-Soon


"I'm Not Alice Kit" by Lorenzen Designs. 
You can find it HERE
Tube of Choice. I used a No Flutter tube.

Mask of choice. I used my mask LLM_107 found on my blog HERE.

Font of choice. I used Curlz MT.
Drop Shadow of choice.
For smaller elements, I use a light drop shadow. 
I also used Eye Candy 4000 for the gradient glow. 


Frame 5  Shift D to duplicate.
Image-Resize canvas to 700x700.

Now, Grab your magic wand, free hand selection, and draw a circle
above  your frame. Add a new raster layer and move this 
layer below your frame. 

Copy and paste a paper of choice into selection. I chose paper 14.
Deselect.

Now add your elements. 

I used:

Border resized to 40%. Move to one side. Duplicate and mirror.
Bow 4 resized to 55%.
Mushroom 1 resized 35%.
Sign resized by 55%.
Bird  resized to 35%.
Smiling cat resized by 35%.
Bottle resized by 40%.
Grass resized by 40%. Duplicate and mirror.

Arrange your elements to your liking, or see my tag to see
where I place mine. 


Now add your mask. I used Paper 20.
Resize your image if you want. I resized mine by all layers.
Mine ended up being a 602x602 image. 

Add your watermark if you wish and copyright for the image you used.
As you see from my tag, my credits are curved, which all I did was put them
on a vector. 


Add your name or name(s) of whoever you want.

I saved mine as a PNG image.


You are done!

Please tick the boxes below and let me know how 
you like my tutorial. I would love to see your results! 


Saturday, July 11, 2015

Sandy Fun


Here is what we will be making:


 Tube of choice.
I used a Greg Horn tube. As far as I know, he does not sell his
tubes anywhere. I got mine from CILM before they closed.
His site is here: www.greghornjudge.com
Horseplay's SandyToes & Salty Kisses Kit. You can get it  HERE.
It is the second kit.
Horseplay's mask 19. You can get it in the bulk download 

of Masks 1-20 HERE Masks 1-20 HERE.

Check the rest of her blog HERE.

 My mask LLM_105 HERE
It is the bottom mask. 

Melissas Creations 
Summer wordart:
HERE.  
(Melissa's WordArt is no longer available, Sorry 😞)

 Ready? Let's Start!


New Image 800x800.

New raster layer from bottom:
 Copy and paste Paper 8 Into selections apply LLM_105.
New Raster layer: Copy and paste Paper 12.
into selections apply Horseplay's mask.


Paste sand on your image and duplicate three times.
Resize if you need to. I did not resize mine.
Arrange to your liking.
Copy and paste tree. I did not resize it.
Other elements I used are:

EL 5-50%
EL-64- Shell resized by 35%.
El 10 -Starfish resized by 30%.
Sunscreen -EL 69 resized 35%.
El 13- resized 50%- Duplicate and mirror.
EL 72-drink resized by 35%.
Wordart from Melissas Creations resized by 50%.
Place where you want and like it.
See my tag to see my placements.


Add your tube of choice. Resize it
appropriately. 

Resized all layers 75%
Put drop shadow of choice on all elements
except mask layers. 

Add your copyrights!!
Add your name (0ptional)
I used Darleston font- Size 72- 0.3 
Black stroke- bg color --#ff40ff

Save as a PNG or JPEG and you are done!

Thank you for trying my tutorial! Please

 tick one of the boxes below to let me know
how you liked it!

If you try my tutorial, please send me your results.

I would love to see them and show them off!


Monday, June 15, 2015

Dad


Well, I am back with another tutorial. 
I saw very few Father's Day tutorials, so I decided to make
one for you all. It is an easy tutorial, so no sweat!

Here is what we will be making today:


I used the following supplies:
Tagalicious Clusters HERE. I used Cluster 1.
Keith Garvey tube. I got it free from PTE.
 You can find his work HERE. (His site is closed now.)
Jaelop Designs Kit Daddy #1 HERE

UPDATE: KIT NO LONGER AVAILABLE. :(
UPDATED 6/23/2024

Becky's site is closed now, 
So the Becky 22 Mask is at the end of this tutorial.
Wordart of Choice.


Shift D to duplicate. Delete or hide credits.
Image resize all layers by 75%--Canvas size to 700x700.
Move the cluster down a bit.
Add a new layer and send it to the bottom.
Take paper 5 from kit and add it as a new layer.
Add the mask from image.
Add any elements you wish.
I found the watch and  picture from another kit.
Add your word-art if you wish. I cannot remember where
I got the word-art that is on my tag, so I cannot share it--sorry.

Add your copyrights, then resize it 
to your liking.

Save as a PNG or JPEG and you are done!

Thank you for trying my tutorial! Please
 tick one of the boxes below to let me know
how you liked it!

If you try my tutorial, please send me your results.

I would love to see them and show them off!


Becky Mask:


Friday, June 12, 2015

Progress!

I have made huge progress in the past month or 
so in getting my desktop back up! I now have
some of my kits and graphics back. Plus a few 
that I did not have!
I did lose the majority of my recent
creations. Oh well, that is my fault
for not backing up my computer as 
often as I should have! 

As for newer tutorials, I am not sure 
about when it will be that 
I will have any up. However, I 
will be back with one,
as soon as my mojo allows! 


Thursday, April 23, 2015

Computer crashed!

A power surge took out my desktop last night.
I am on my laptop right now. 
I lost most of my files. So as soon as I can, I will be posting more tutorials.
I hope to have this lap top up to par where I can
do so. 

Hopefully, I can get most of it done over the weekend. 

See yas soon! 


Saturday, March 28, 2015

Adore


Tube by Yen Bui.
Yen Bui's site here:  www.yenbui.com

Cluster by Basima at
http://crispified.blogspot.com.au/
The Cluster is in this HERE
( 5th cluster down--Botanique  by BLT Dezignz)

Midsummer Dreams Kit by Vesta HERE

Adornment by Janet HERE.
(The second one.)


Mask of choice or My Mosaic mask HERE.
It is the first one. :)

Font: Allison Rob.
I also used Pixelette for the Credits.

 
Drop shadow I used: 1, -1, 50, 0,  Black for the elements, except the sparkles.

This is a short and easy tutorial! I use Paint shop Pro 9,
and it should be able to be easily adapted to any program.

Open your Cluster and Shift D to duplicate. Close original.
Delete the credit layer.

Resize the cluster to about 75%.
 Take your magic wand, set it on the free hand selection setting,
 and draw a circle on top of the cluster.
 
Go to Selections, Promote selection to layer. Deselect.
Now move this promoted layer below your frame. Copy and past a paper
of choice into the selection. I used Paper 13.

Sparkles from Midsummer Dreams Kit resized by 70%
I duplicated the layer a couple of times and placed them around my
tag.
Bottom layer. Make a new raster layer- Select all, 
copy and paste the paper of choice into selections
and add your mask from image. I used Paper 5.

Add your tube on top of frame.
Now is the time to add any other elements you want and drop shadow them.

Add your copyright and watermark after you resize it.
I resized mine to 604x604.

Now you are done. Export as a PNG or JPEG.

Thank you for trying my tutorial! Please
 tick one of the boxes below to let me know
how you liked it!

If you try my tutorial, please send me your results.

I would love to see them and show them off!


Wednesday, March 11, 2015

Paddy's Blessing

First I want to remind you that I use Paint Shop Pro 9, so all
of my tutorials are based upon using this program. However,
my tutorials should be able to be applied in any application.


The tube I used is Creo from http://www.creddy.at/index.php

St Pattys Day Kit By Mizteeque HERE.

Mask LLM Clover 7 (Masks by Lori2165) Here at the Creative Chicks Blog Creative Chicks Blog HERE.

Font Brannboll small.
I used the Bright Emerald pattern in my PSP for the Background.

Optional-Plug-In: Eye Candy 4000 for the name.
If you do not have this plug-in, you can also use an alternate. See my tutorial on Alternate to Gradient Glow here:
http://lorispsptuts.blogspot.com/p/blog-page_62.html

I also gave each template layer a white background noise layer.
To do this, click on the layer with your magic wand. Then, make a new raster layer then
expand selections by 2-3 and  floodfill with white.
Deselect. Now move this layer under your paper. Add noise to your
satisfaction. I used 100% .

Shift D to duplicate- Canvas size 800x800.

Delete or Hide Info and Font Info layers.

For the mask, go to bottom layer, add a new layer,  and
copy and paste Paper 1 into selection.
                                   Add  mask -LLM Clover 7 from image, then  resize it  by 102%.
Do the same with Paper 9, but resize it by 105%.

Large green rectangle -- Paper 7 into selection. Delete or hide template layer.

Black circle-- Paper 5 Pasted into selection. Delete or hide template layer.

Small orange circle-- Paper 3 pasted into selection. Delete or hide template layer.

Green rectangle --Paper 4 pasted into selection. Delete or hide template layer.

Black rectangle -- Paper 6. Delete or hide template layer.

Orange rectangle -- Paper 1. Delete or hide template layer.

Taupe oval -- Paper 2. Delete or hide template layer.

Green oval --Paper 9. Delete or hide template layer.

Dotted oval-- Manual Color correction to a green color.
Here are my settings:


Black strip -- paper 8 as a new layer and resize by 65% and move it to where you like it. Selections invert and delete.
This layer I expanded by 2 for the white with noise. Delete or hide template layer.

Grey strp --Paper 3 as a new layer and resize by 65% and move it to where you like it. Selections invert and delete.
This layer I expanded by 2 for the white with noise. Delete or hide template layer.


Orange circle-- Paper 1as a new layer and resize by 65% and move it to where you like it. Selections invert and delete.
This layer I expanded by 3 for the white with noise. Delete or hide template layer.


For the Shamrocklayer, I used the Manual color correction to change the color to #35810a. Then I gave it an Inner bevel.


Duplicate the shamrock and Resize by 50% and duplicate a few more times and place them around the tag.

I used word art option 4 recolorable  With shadow on new layer.
Here are my settings for the dropshadow that I used:


Resize all layers by 75%.

Elements used (After resizing all layers):

Element 2- Butterfly resized by 15%.
Element 9 Resized by 40%.
Element 12  Element 12 Resized by 35%.
Element 36 resized by 10%.
Rainbow resized by 45%. 
(Add any additional elements that you like to.)

Drop shadow each layer you want.
Here are my settings for the drop shadow that I used:


Add your name, copyright and watermark if applicable.

Save as a PNG or JPG. Up to you!

NOW YOU ARE DONE!

Thank you for trying my tutorial! Please tick one of the boxes below to let me know
how you liked it!

If you try my tutorial, please send me your results.
I would love to see them and show them off!